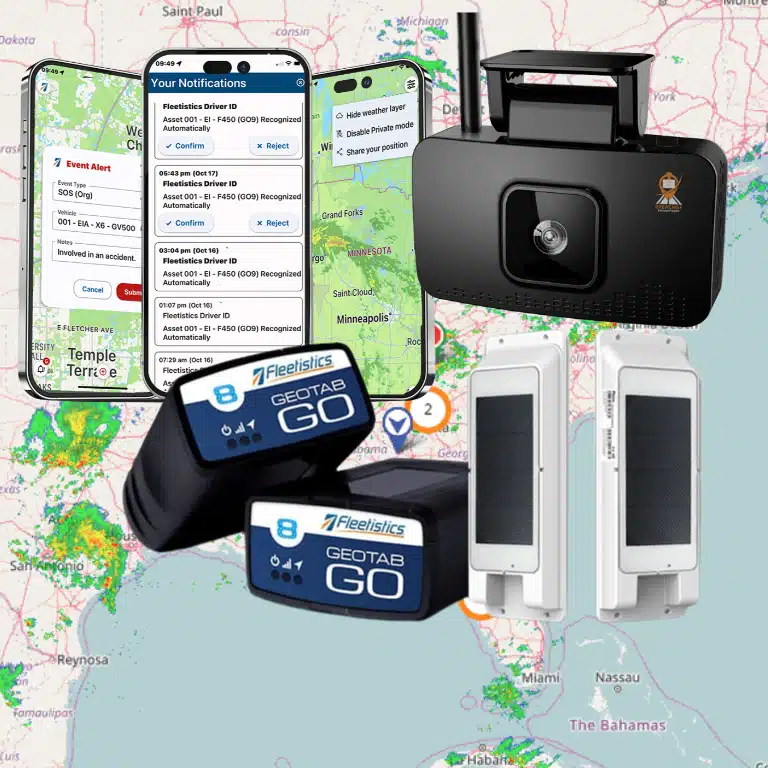


Since you have made the decision to invest in Dashcams, GPS and telematics, you now have to work through the installation project. This blog will provide you thoughts and considerations based on 23+ years of experience doing installs and working with installation professionals on small projects at hundreds of locations and thousands of vehicles. The concepts apply if you are installing Fleetistics, Geotab, Samsara, Verizon or other fleet management technology. When you choose a course of action, it is important to remember that every delay is an opportunity for ROI that cannot be recovered. The sooner you get control of fleet activity and modify unwanted driving behavior, the faster and greater the ROI. Best in class fleet managers achieve an annual ROI of about $2500 per vehicle.
Once a project manager is identified, decide if you will do the installations “in-house” or contract a professional GPS installation company. Many business owners think they can save money by doing it in-house, but few seldom do. If you believe time is money, then you realize the slower the installation, the further out your ROI. A professional installation company may save you a lot of money in payroll but also find the ROI in 30 days verse 6 months if done in-house. An installation company has skilled workers and the administrative and project management experience to make the installation process go quickly. If deploying GPS and telematic trackers, devices, or dashcams, they have done thousands of them and can do them in half the time. A rapid install also reduces the impact on operations and vehicle downtime. Professional installers are not likely to interfere with the vehicle’s safety system, such as putting a wire around and air bag, so it won’t deploy properly. Professionals will avoid connecting to computer lines and use test meters instead of test lights. They will use proper connections and good device placement resulting in far fewer service calls.
Initial installation is just the start. Most fleets replace about 20% of their vehicles annually and replace a lot of windshields. This means the GPS or dash camera must be uninstalled and installed in the next vehicle. In this situation, you may want to be able to do a “swap” in-house. Swaps can often be done with less time pressure. Replacement vehicles are planned well in advance so there is no need to take a truck off the road during working hours. Some fleets will simply put a new device on every new vehicle to avoid dealing with swaps. Other fleets will use the same installation company to do swaps. It is important to discuss swap internally a decide how you want to handle them before they pile up a few months after the initial installation.
Dashcam Installation Considerations
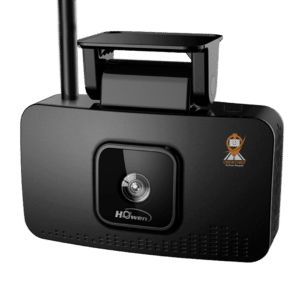
Dashcam installation is fairly straightforward. The biggest issue is the installer not following the instructions on how to mount the camera to the windshield. Dashcams need to stay in place for years under extreme conditions. Each manufacturer has developed a protocol for secure mounting. Some dashcams, like the Fleetistics CrewChiefTM dashcam, separate the mount from the camera. This makes preparing and placing the glass easier. It also makes moving or replacing a windshield an easier process because a new mount can be purchased for the new glass making it a much faster process. Dashcams like the Rosco dashcam require specific cleaners and a two-part process developed with 3M to create the strongest possible mount but there are specific steps that must be followed under certain weather conditions.
Dashcams that include DMS and ADAS need to be calibrated. If you are unsure of what DMS and ADAS is, you likely do not have this included in your dashcams. Some dashcams like the Fleetistics CrewChiefTM can be upgraded after in the future if you find this is a necessary functionality. In short, these features are designed to improve safety and reduce accident liability but they come with a large number of false positives which must be managed.
GPS and Telematics Installation as a Service
This is a brand-new concept where the customer pays a small monthly fee and receives X installs or service calls per month without additional billing and administration. The monthly fee is based on the vehicle turnover rate, X miles of travel to vehicles, accident rate, and projected service rate for the technology being installed. It is not necessarily to save money but to save time and administration handling routine work which will be part of any fleet management program. Ask your installation provider if they offer this GPS and telematics installation service since it is new to the aftermarket installation industry.
Wiring Connections
Something as simple as the type of wiring connection used can make a huge difference in troubleshooting for years to come. Connector types have evolved over the years and are much more secure than in 2001. Old connectors worked well for a while but they eventually worked loose and would provide intermittent power leading to difficult troubleshooting and burned out electronics. Talk to your installer to determine their proposed method and come to an agreement on the specification for your project.
There are 3 generally accepted methods plus one proving to be effective:
- Soldering connections is bulletproof and never disconnects is the slowest method and will cost more.
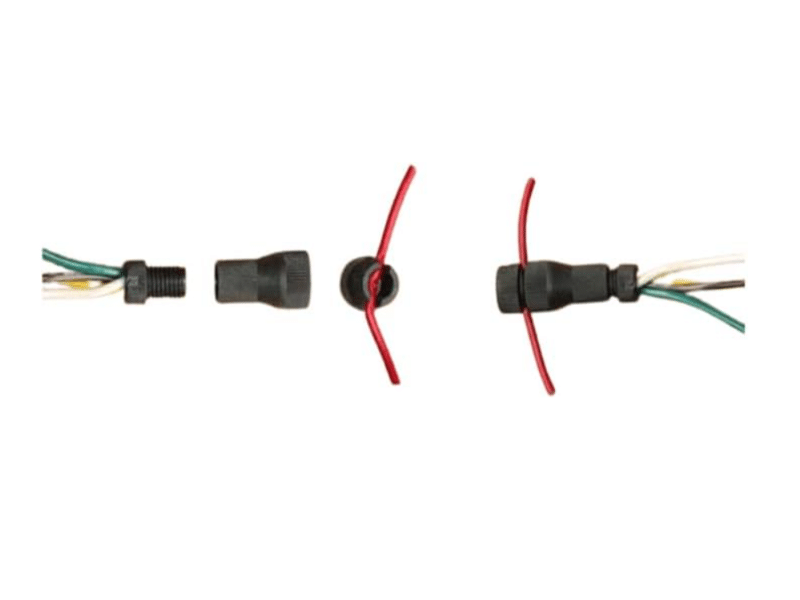
- The poke and wrap was developed by the military and lasts a long time when done right but is only a little faster than soldering.
- Posi-taps are the latest connector widely used by professional installers.
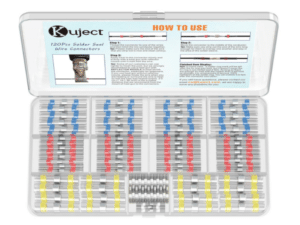
- New technology is heat shrink and solder butt connectors
You might think plugging into the OBD port is straightforward but what happens if a mechanic needs to use a scan tool? Will a T-harness be used? Is the harness sufficient to enable securing the GPS and telematics device in the designed location? If the installation includes connecting to auxiliaries like used by Geotab, several harnesses may be needed. When using more than one harness, limitations apply to the number, sequence, and other factors that need to be specified for the installers.
Installation Project Management
Installing 5 to 100 devices at 1 to 5 locations is a relatively straightforward process if you follow a few basic steps. The company selling you the GPS and telematics or dashcam service should provide guidance and possibly project management. The principles of project management apply to creating the who, what, when, where and how. An online tool such as Trello can keep everyone on the same page, track due dates, and enable inventory to be delivered on time.
When conducting an installation project think about what happens after the initial installation. Who is going to do swaps and service calls? If the installer flew someone for the initial installation, will they fly back to do a service call or swap when new vehicles arrive? Unlikely. The cost to return for a single vehicle is cost prohibitive but this scenario must be addressed. Maybe the installer can train a local employee during the initial installation. Often times a local company can handle the service work but are not well suited for the initial project. Service work and swaps will be continuous as long as you have the technology so having a good plan is a great idea.
When putting the GPS and telematics installation project together, plan for 30 minutes per vehicle for a basic OBD device with a T-harness. For a dashcam, 45 minutes should be sufficient. Some installs will get done faster. There are always delays and the time averages over the fleet. If vehicles are available after hours, telematics installers can work from 4 PM to late into the night. This is ideal in many ways except during Winter. Night is often cooler, vehicles are sitting ready, equipment is staged, and the installers just need to get to work. One experienced installer can do as many as 50 vehicles in 12 hours! If vehicles are not available after hours, setup a schedule for them to return to the office every 30 minutes. This minimizes wait time at the installation location and the impact on operations. The less available the fleet, the more expensive the installations will be.
Prior to starting installation a coordination meeting should be held to discuss all aspects of the project. One aspect that can cause a future nightmare is poor documentation. If the right information about the GPS device and vehicle is not documented, knowing which device is in which vehicle can be almost impossible. The installer, GPS vendor, and customer must all be on the same page. One trick of the trade is to apply a decal from the telematics shipping box onto the door jam. If there is any initial confusion, this decal is easy to read without removing any dash components. This simple step can make a mistake go away very quickly. Today there are mobile apps which make documentation much easier. Scanning device codes reduces errors and the data feeds into the fleet management system in real-time. Steps cannot be skipped which reduces errors when installers are tired and in a rush. Handwritten notes lead to mistakes which are easily avoided with a mobile app.
Give Fleetistics a call if we can be of assistance with GPS, telematics, dashcams or integration services.
Search for fleet installers and fleet services near you.

Geotab installations:
Fleet Tracking and Telematics

Fleet Management

Mobile Tracking Apps

Fleet Safety